Page 7 of 8
Re: Current Builders' Status

Posted:
Tue Nov 28, 2023 2:35 pmby Creekboater
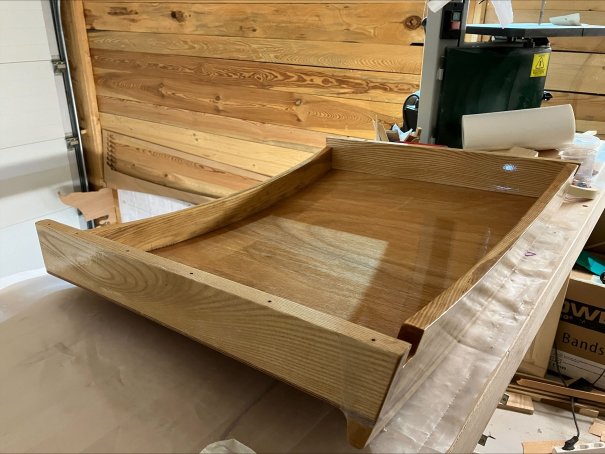
Floorboards are all cut and fitted. That was probably the most challenging and fun piece so far.
Re: Current Builders' Status
Posted:
Tue Nov 28, 2023 3:58 pmby dbeck
Nice. You still need to create the lift-out sections. At the time we installed the floor, we had epoxied additional cleats to bulkheads #4 and #6 (= cleats on both sides). One cleat for the screws, the other one as a landing space for the lift-out section(s).
Re: Current Builders' Status
Posted:
Tue Nov 28, 2023 6:22 pmby Creekboater
dbeck wrote:Nice. You still need to create the lift-out sections. At the time we installed the floor, we had epoxied additional cleats to bulkheads #4 and #6 (= cleats on both sides). One cleat for the screws, the other one as a landing space for the lift-out section(s).
You're correct. All my boards are back on the bench for roundovers, oiling, etc. as well as cutting the lift outs. I also added some extra cleats but on floors 4 and 7 for a little extra length. Mine are also going to be 3 boards wide, but I had cut my boards down to 2.5" in width so my lift outs won't be much wider than most folks' in the end. If you notice, I have 9 boards on each side of the centerboard trunk instead of the usual 8. Check out my blog if you want the long boring details!

Re: Current Builders' Status
Posted:
Mon Dec 04, 2023 9:04 pmby Hooky
Good job Martin, can’t wait to see the edges routed and oiled, then you cover up all that hard work with cardboard to keep clean and provide protection. Give you a little tip……leave one section of cardboard that can be easily removed so you can show off the beautiful timber floorboards to family & friends.
Cheers mate
Terry
Re: Current Builders' Status
Posted:
Mon Dec 04, 2023 10:30 pmby Creekboater
That’s a good idea Hook. Will probably take a few sneak peeks myself every now and then!
Roundovers and sand to 120 is complete as of tonight. Getting to 220 will be quick, then time to oil. Need to get my bilge painted!
Re: Current Builders' Status
Posted:
Thu Dec 07, 2023 1:43 pmby dbeck
It is exactly two years, that we received our kit from fyneboats (UK). We spent about 980 hours on
our build so far.
The last month we worked on the port-lights and companionway hood, nothing spectacular. It became too cold for epoxy work or painting
Cheers, Dietrich
Re: Current Builders' Status
Posted:
Thu Dec 07, 2023 4:55 pmby Creekboater
That's good progress in my book Dietrich!
Re. Current Builders' Status.
Posted:
Sun Dec 31, 2023 5:30 amby Hooky
It has been a while since I posted a builders update so here is my latest accomplishment.
The installation of the footwell floor completes the construction of the aft cockpit area, Its now ready for filleting and glassing.
I left the footwell floor install till last to provide easy access running the wiring through the 25mm conduits that ran under the floorboards through BH8 into the foam buoyancy area and through to the junction boxes in the lazarettes. Using a Forstner bit I drilled the drainage holes for the aft storage areas and the transom. Now the area is ready for filleting and glassing.
Check out the progress on my blog.
https://hookypocketship.blogspot.comCheers Terry from down under.
Re: Current Builders' Status
Posted:
Mon Jan 01, 2024 3:04 amby dbeck
A few warmer days provided the opportunity to glue the companionway hood onto the cabin deck. Both, hood and slide, have been glassed and received several coats of epoxy.
Hm... Maybe this was the last time we glassed something?

A happy new year 2024 to all of you.
Dietrich
- slide.jpg (58.48 KiB) Viewed 59648 times
Re: Current Builders' Status
Posted:
Wed Jan 03, 2024 2:51 pmI suggest cutting or carving the real lower edge of the slide to create a "drip edge", so that rainwater
will definitely drip off the outside edge, instead of creeping forward and dripping into the cabin.
Ideally this would be done before assembly by cutting the bottom edge of the rear piece so that it
slopes to the rear. Myself, I ended up doing it by hand after the slide was assembled...
Doug